
The Blending Stump & Tortillion

When I started taking art classes again, I quickly realized how much I didn’t know. I’d converse with my teacher and the language was so foreign to me, I’d to stop her often to ask, “what’s that?” Suddenly, insecurity washed over me about sharing my journey in this blog. I really hope I don’t look like a fool blogging about art since I’m not an expert and I’m learning as I go. But today I feel like a kid in a candy store. I’m chuckling on the inside because I feel excited about discovering The Blending Stump!
What’s a Blending Stump?
A blending stump is a simple tool made of compressed paper with a coned shaped tip on both ends. It can be used with graphite, charcoal and pastel. The practical application of its use would be for shading, blending, smoothing and smudging.
What’s a Tortillion?
The tortillion is made of tightly rolled paper, also with a coned shaped tip. It’s also used for dry media and looks similar to the blending stump. The difference is how it’s made and the type of paper. These are made with harder rougher paper. They are also smaller than the blending stump, so it’s great for details.
Recommended Buy
Norocme 12 PCS Blending Stumps and Tortillions Paper Art Blenders with Sandpaper Pencil Sharpener
This 13 piece set consists of 6 Blending Stumps, 6 Tortillions and 1 Sandpaper Sharpener. It’s also a 2021 Amazon best seller.
DIY
Although they are very affordable, sometimes you just need to save your dollars, or if you like DIY projects, you can try making your own. I couldn’t wait for Prime delivery so I gave this a try.

Supplies
Supplies
Paper
Scissors
Tape
Sandpaper
Box cutter (Optional)
I used the paper cut from my sketch book because it has a thicker weight than regular paper.

Step 1 & 2
Step 1
Cut a piece of paper in a rectangle.
Step 2
Cut an angle out of the paper
Step 3

Step 4
Use the scissors to curl the paper, the same way you would curl ribbon.
Step 4
Roll the paper as tight as possible, trying not to have a hallow center.
I noticed this process took longer than I anticipated because of the paper’s weight. The heavier the paper, the longer it takes to break it down for solid roll.
Step 6
Step 5
Tape the end of the paper down by the center & towards the opposite end of the blending tip. If the roll does not already have a cone shaped end, you can use the box cutter to shape the tip to a point.
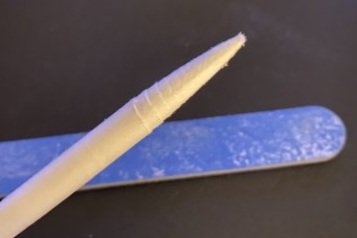
Step 6
Use sandpaper to smooth the edges of the coned tip.
Happy blending!!